Category: Food and Beverage

  • Peach Cobbler and the new a la mode style

    Peach Cobbler and the new a la mode style

    Peach Cobbler and the new a la mode style.

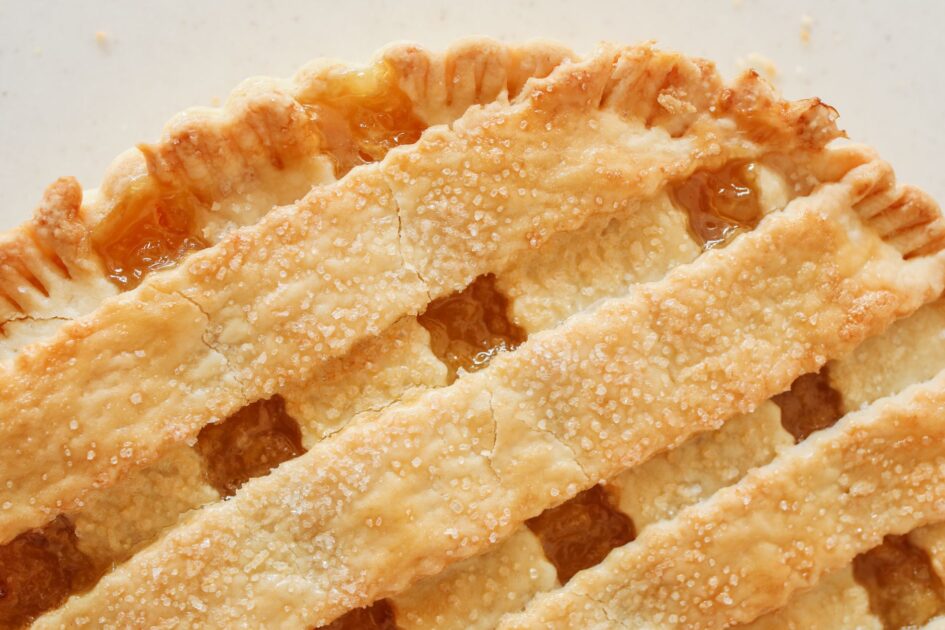
    Oh that peach cobbler goodness. Made from scratch and oven baked, it’s a delicacy anytime as well as a seasonal treat. Once upon a time there were many variations in a Peach Cobbler prepared from scratch. Furthermore, if there was a large family involved there could be more than a few varieties, or styles, of peach Cobbler.

    It might seem a little strange that there could be more than one variety of Peach Cobbler, but that is what makes the dessert such a treat. The only absolute standard, is that it should contain peaches. Therefore, everything else is up to tradition and baking skill. A traditional peach cobbler is best when made from scratch. It might take longer but the result is worth the wait.

    peach cobbler

    With this in mind, occasionally something comes along that changes everything. The discovery of the wheel comes to mind. However, this article (story) isn’t about anything so revolutionary. In fact, it was just a couple of days ago that everything seemed normal, but it was also Friday the thirteenth. However, there was notable news for a Friday the thirteenth. For example, the SpaceX launch. And what made that incredible was the catch, 22+ hours later. Indeed! You read that right. A spaceship didn’t land back on earth. They caught it.

    Peach Cobbler

    The original Peach Cobbler is as much a family tradition, as it is a regional tradition. It is largely featured in family gatherings where the recipe is a family secret. In many cases it is kept under lock and key. Private security ensures that the recipe stays out of the wrong hands. Grandma is the boss. That may be an exaggeration, but the fact that a family holiday is just ahead, is not.

    The Thanksgiving holiday is just ten days away. For those who celebrate the family oriented holiday it is an opportunity for families to gather. Furthermore, the day is a holiday and most everyone appreciates the break from the day to day grind. Oh, and Turkey. For the traditional gathering, the Turkey is the star of the show. The gravy and cranberry sauce are the extras that really make all the difference. As does the peach cobbler.

    Or the Apple Cobbler. Maybe there is a family gathering that features pies. Chocolate Cream Pie, Banana Cream Pie and the ever delicious Pecan Pie. Cherry Pie, Apple Pie and Peach Cobbler. Also Apple Cobbler, and the rare, but delicious, Blackberry Cobbler. This is just a small sample of the possible dessert lineup, for a Thanksgiving day meal.

    The New A La Mode Style

    Although it is an appetite stimulant to name off all those tasty desserts, the craving deepens when the concept of A La Mode arrives. This is the icing on the cake. Or, the ice cream on the cobbler. Furthermore, it is especially appealing when the cobbler (any cobbler, but especially Peach Cobbler) is still hot from the oven. The ice cream naturally cools the hot dessert. As it melts, it combines with elements of the cobbler. Then it creates an entirely new flavor dynamic.

    peach cobbler

    It’s hard to ignore the resulting bonanza of flavors. In fact, it’s almost impossible to say no to seconds. The ice cream adds to the Peach Cobbler like whipped cream adds to a healthy wedge of Pumpkin Pie. Traditional family gatherings are the best times to experience these all too rare treats.

    With this in mind, this article is a two part update. To the regular visitors of this site, you may have noticed some changes. There have been a few changes in an effort to make the site more efficient and user friendly. Please bear with the website design team as they adjust the recent updates. We are almost there.

    I’ll Have the Peach Cobbler

    The stories on the blog of this site that are currently in progress will continue soon. They will each pick up where they left off. Which is important because some were on the verge of something huge. As this site develops it will become easier to navigate. Especially in regard to complete stories. The ebooks menu option goes to the ebooks download page where ebooks, exclusive to this site, are downloadable. Take a few minutes and browse the selection today and stay tuned for upcoming short stories. Thanks for reading.


    The Retrieval of Jupiter’s Heart – Free PDF Download

    Exclusively on The Frog Journal

    We don’t spam! Read more in our privacy policy

    Thank you for reading! Like, follow and share The Frog Journal on X @1finja1 – and on The Frog Journal Facebook page click here. Subscribe to the free newsletter to stay up to date on new content and updates.

  • The eggnog special – Return of the seasonal treat

    The eggnog special – Return of the seasonal treat

    The eggnog special – Return of the seasonal treat.

    Some things are so good they only come around once a year. It’s a seasonal thing. In fact, since it’s seasonal, it becomes even more exciting when it happens. For example, Easter. It happens in the Spring. And it’s almost impossible to find a chocolate bunny before then. The same holds true for eggnog. It is a rare treat and is only plentiful once a year.

    With this in mind, things that are only available yearly, are special. Either by being rare, therefore highly sought after, or by being seasonal. For example, Pumpkin Spice coffee in the Fall. Like turkey at Thanksgiving eggnog fits this system nicely. Plus it’s delicious. That is with alcohol, or without. Additionally, eggnog is versatile. From Christmas party specialty drinks to a perfect beverage choice to accompany a tray of Christmas cookies.

    The seasonal nature of eggnog is one of the things that make it so special. It isn’t uncommon to find many fans when the tasty treat returns to the dairy cooler section of the local grocery store. Maybe it’s the season. Sometimes it comes from fond childhood memories of the season. Whatever it may be, the idea of something unique, so closely related to a season, is a pretty good definition of a seasonal treat.

    The Eggnog Special

    Did someone mention seasonal treats? Finally, the holiday season rolls around and seasonal treats are back on the table. In a manner of speaking. However, as some of the more popular holidays draw near, the search for seasonal inspiration sometimes yields surprising and unexpected results. Eggnog is a rare and seasonal item. Recipes that use eggnog as an ingredient are typically deserts or drinks.

    eggnog

    Eggnog cheesecakes, French toast bakes, and heavy cookies are all common for the seasonal treat. They are also among the top searched recipes. Although they sound appetizing and appealing, these deserts have trouble when it comes to the humble custard. Even the name custard sounds like a decadently delicious desert.

    With this in mind, a good custard recipe fits in nicely with the upcoming seasonal holidays. Furthermore, this recipe draws directly from early 20th-century farmhouse baked custards. It repurposes prepared eggnog by using its rich cream, sugar, and spiced base, as the liquid foundation. It requires just four ingredients and roughly 5 minutes of active prep time. The result is a silky, gently set dessert, served warm or chilled in individual cups, scented with fresh nutmeg and bourbon.

    Ingredients (Yield: 4 Servings)

    • 2 cups prepared traditional eggnog (full-fat dairy eggnog, store-bought or homemade)
    • 3 large egg yolks
    • 1/2 tsp pure vanilla extract (or 1 tbsp bourbon/dark rum)
    • Pinch of fine salt
    • For finishing: Freshly grated whole nutmeg

    Step-by-Step Instructions

    1. Preheat and Prepare: Preheat the oven to 325°F (165°C). Place four 4-ounce ramekins or oven-safe ceramic teacups inside a deep 9×13-inch baking pan.
    2. Whisk the Base: In a mixing bowl, gently whisk the 3 egg yolks with the pinch of salt and vanilla (or bourbon) until smooth. Pour in the 2 cups of eggnog and whisk gently until combined.Tip: Whisk slowly rather than vigorously to avoid creating surface foam, which keeps the baked top smooth and glassy.
    3. Set Up the Water Bath (Bain-Marie): Divide the custard mixture evenly among the ramekins. Pour hot tap water into the outer baking pan until it reaches halfway up the sides of the ramekins.
    4. Bake: Bake for 35 to 40 minutes, until the edges are set but the center retains a slight, gentle wobble when tapped.
    5. Finish and Serve: Carefully remove the ramekins from the water bath. Grate fresh nutmeg generously over each top while still warm.

    Serve warm with a spoon, or chill in the refrigerator for at least 2 hours for a dense, silky texture. The custard is delicious, warm or chilled. The recipe’s official name is the Old-Fashioned Baked Eggnog Pots de Crème. It’s an excellent choice for a simple, yet uncommon desert idea. Thanks for reading.

    eggnog

    The Retrieval of Jupiter’s Heart – Free PDF Download

    Exclusively on The Frog Journal

    We don’t spam! Read more in our privacy policy

    Thank you for reading! Like, follow and share The Frog Journal on X @1finja1 – and on The Frog Journal Facebook page click here. Subscribe to the free newsletter to stay up to date on new content and updates.

  • Cooking from scratch – Better light and fluffy biscuits

    Cooking from scratch – Better light and fluffy biscuits

    Cooking from scratch – Better light and fluffy biscuits.

    Light and fluffy biscuits. The centerpiece of every sausage and egg breakfast. When I was a kid, I would sit at the kitchen table and watch my Granny cook dinner. This always took place at four in the afternoon. It also always began with the biscuits. Or the cornbread. However, the cornbread will have to wait for the next recipe article. The biscuits were made from scratch. Furthermore, that is the theme of this article. Cooking from scratch.

    It’s tough to visualize how that might sound in today’s world. Cooking from scratch is very much old school. Additionally, it is not centered around convenience. In fact, cooking from scratch, is all about timing. For example, the biscuits my granny used to make were actually a timed part of the family meal. And it was a family meal. She would prepare a four or five item supper, from scratch. With every part of it timed so that it would be ready at or near the same time. Very impressive considering there were no microwaves or other miracle appliances to help.

    Having all the different parts of a balanced meal ready at the same time is a cooking skill. It’s one of the reasons a dine-in restaurant makes the big bucks. Likewise, it’s why the food tastes so good. In most cases it is freshly prepared. Microwave use is at a minimum in a five star restaurant. Food comes from adding ingredients together and then cooking them. The comparison in quality between freshly prepared food and frozen food is extremely one sided.

    Cooking From Scratch

    The comparison in quality between freshly prepared food and frozen food is extremely one sided because fresh food wins every time. Ever had a breakfast at Waffle House? If not it’s worth a try. Waffle House is not offering any compensation for this advertisement and they wouldn’t have to anyway. Their cooking speaks for itself. Waffles are made straight from the batter. Eggs are real. They crack them and cook them to order. Bacon sears on the griddle while the coffee brews. Compare that to a frozen meal. Frozen waffles and frozen eggs.

    Maybe the eggs are semi real. They don’t look like eggs, but that could be because they are frozen. The waffles are like cardboard, but with enough syrup they are manageable. Not so with a waffle made from the batter, and cooked in a waffle iron. The comparison is to say, there really is no comparison. Cooking from scratch is budget friendly and healthy. Additionally it is a way to save time. And while that might seem unlikely, there are more than a few examples.

    Ingredients can be used for more than one batch. In the case of the biscuits, the flour is the self rising kind. Even the smallest bag of flour has enough flour for more than one batch of biscuits. In fact, for this particular recipe there are only three ingredients.

    cooking from scratch
    Cooking from scratch

    Ingredient List For Light Fluffy Biscuits

    • All purpose self rising flour.
    • Fat (Butter, Lard, or shortening) The colder the better.
    • Whole Milk or Buttermilk
    • (2 cups) Self Rising Flour
    • 1/4 cup (4 tbsp) Cold unsalted butter
    • 3/4 cup Cold Milk/Buttermilk

    There are very few ingredients and they blend together to make light fluffy homemade biscuits. While preparing the dough preheat the oven to a toasty 450 degrees. Additionally set the cookie sheet or baking pan in the oven. A hot pan gives the dough a crispy edge. Next, in a separate bowl, mix the flour and the butter together. A cheese grater will help if the butter is cold enough. Additionally cutting the butter into small cubes will work. Combine the butter and flour until a coarse, crumbly dough forms.

    cooking from scratch

    Next, add the milk. Make a hole in the middle of the newly formed dough ball and add the milk. Mix the dough until a rough looking dough forms. It won’t be pretty, but that’s okay. Once the dough forms solid enough to move, place it on a flat surface and pat it into a square roughly and inch thick.

    cooking from scratch

    The Fold – Cooking from Scratch

    The fold is the secret to layers. This is why a rough looking dough that hasn’t been overworked is best. After spreading the dough into the inch thick square, fold it over on itself one time. Then turn it 90 degrees and press it out into a one inch thick square, again. Then fold it one time, again. Repeat this four of five times. Then on the final fold, press the dough into a 3/4 inch thick square and using a cookie cutter or the opening of a glass, begin cutting biscuits from the dough.

    cooking from scratch
    Oddly shaped leftover dough biscuit, lower left corner.

    Once the biscuit discs are ready, pull the hot pan from the oven. Place the biscuit discs on the pan with the sides touching. (Sides touching makes the biscuits rise taller. Spaced apart makes the biscuits spread outward.) Bake for 12 to 15 minutes, or until the tops are golden brown. All that folding creates those fluffy layers. Once the biscuits are ready, pull them from the oven. Then immediately brush the tops with melted butter.

    cooking from scratch
    Butter the tops after baking

    Buttering the top of the biscuit, softens the top crust and gives the biscuit that classic dinner glow. This is a quick and easy recipe to practice cooking from scratch. The preparation time is minimal and the ingredient list is small. Furthermore, the entire recipe is user friendly. The ingredients in the image above are enough for two batches of biscuits. Similarly, the cost is under ten dollars. Preparation time, and total cooking time, is under forty five minutes. Placing the biscuits close together, with sides touching, created the best rise in the dough. More cooking from scratch, in upcoming articles.


    Thank you for reading! Like, follow and share The Frog Journal on X @1finja1 – and on The Frog Journal Facebook page click here. Subscribe to the free newsletter to stay up to date on new content and updates.

  • Chicken noodle soup and a shiny new car

    Chicken noodle soup and a shiny new car

    Chicken noodle soup and a shiny new car.

    Some of the best recipes come from scratch. And the last thing anyone wants on a shiny new car is a scratch. That’s not just a play on words. That’s two different kinds of scratch. Imagine paying over twenty thousand bucks for a new car. Some don’t have to imagine it. For some, it’s already in the driveway. Currently without the scratch. How much would a scratch like that be worth? Furthermore, what about the vehicle that costs upwards of fifty thousand? It’s probably got lots of bells and whistles. When it’s not a large habitable brick.

    If only that were a joke. I remember the first new car rental I drove. It had a serious malfunction. It stalled out at every stop sign. What’s worse, it did the same thing at a red light. Not only was this alarming, it was also dangerous. Reliance on a running vehicle is a fundamental part of driving and vehicle ownership. Furthermore, there are many do it yourself enthusiasts repairing vehicles to save money. The last thing anyone wants to do is replace a starter more often than necessary. Some of them are seriously hard to reach. Additionally they are expensive.

    A Shiny New Car

    With this in mind, the stop start at every stop, was impractical. Furthermore, there is an age old debate about the efficiency of the stop the motor at the red light to save gas. It’s called, not idling, while stopped. People were doing it back in the seventies. Back when gas stations had cars lined up for miles waiting to get gas. There was a gas shortage and not idling while sitting was one way to save gas. But did it really save any gas? Or did it take more gas to start the vehicle back up? The decision was up to the vehicle owner. It wasn’t a built in safety risk.

    chicken noodle soup

    Fast forward into this day and age, and the decline of the shiny new vehicle remains. In fact, it’s even more perilous than the not very useful start stop safety compromise. It relies on cameras and artificial reasoning to determine if a vehicle owner can actually use the vehicle they own. Forget the key. It’s an eye scan and fingers crossed that the damn thing will start. Fifty thousand dollars, and even more in many cases, and the vehicle has the ability to disable itself. Not from use. Not from mechanical alerts, or issues. It can just decide no.

    Chicken Noodle Soup

    Chicken noodle soup made from scratch doesn’t need any start stop technology to hit the ground running. Food made from base ingredients, and made at home, is the stuff of legend. Furthermore, that old school, made from scratch cooking, is a solid anchor point for a family meal. And a family meal is just another name for a family get together. Similarly, there is quality time built into that family meal.

    Chicken noodle soup made from scratch means an investment of time. Someone must prepare everything. Then there are some things that go very well with chicken noodle soup. Like hot buttered rolls. And steamed broccoli on the side. There are more than a few things that add balance to a healthy serving of homemade soup.The value is in the quality of the meal, and the family time it can inspire. Furthermore, it’s an old school concept. Something the elders brought with them from the halls of the past.

    Shiny New Chicken Noodle Soup

    The old vehicles started reliably when they were well maintained. In the not too distant past, schools had vocational classes for learning engine repair, and auto body repair. Vehicles were advertised as a quality investment because they were reliable. They started on demand. The vehicle owner, or the one with the key, decided when the vehicle stopped, and when it started. Attentive vehicle maintenance was a sign of quality care. It still is, if the vehicle will let the owner drive it.

    chicken noodle soup

    While it might be too late to ever get a decent new vehicle, it’s not too late for quality food. Or quality time with family. Furthermore, these things matter more than ridiculously expensive vehicles that promise potential failure the moment they are driven off the lot. Yes it’s a new seventy thousand dollar truck. No it won’t start currently. Yes, it’s an extremely expensive random box that may, or may not work when you need it. At least chicken noodle soup, works every time.


    Thank you for reading! Like, follow and share The Frog Journal on X @1finja1 – and on The Frog Journal Facebook page click here. Subscribe to the free newsletter to stay up to date on new content and updates.


  • A cast iron skillet and the best cornbread recipe

    A cast iron skillet and the best cornbread recipe

    A cast iron skillet and the best cornbread recipe.

    It’s been years since I thought about that old cast iron skillet. From cornbread to pork chops, that old skillet was a part of almost every meal. In those days there were very few ready made options. In fact, the first consumer grade microwave ovens still hadn’t hit the market in those days. Therefore, cooking from scratch was still a common practice. Which meant recipes were often handed down from generation to generation.

    There was no internet. Furthermore, recipes were hard to come by, and my Granny didn’t need a recipe anyway. In fact, she already knew it. I remember watching her get that skillet ready first thing in the morning for fried eggs and sausage. Or, if it was close to Friday, bacon. Cooking oils were not a first choice in those days. Or at the very least, they were rare. Lard was the cooking oil of choice and oftentimes Granny would save all the grease from the cooking. Then, strain it, and store it for reuse later.

    With this in mind, the old cast iron skillet was at the center of everything. She used it in the early afternoons to make the cornbread for the evening meal. Then, the cast iron skillet would be available for frying hamburger patties or pork chops. And sometimes potatoes. Especially fried potatoes and onions. A classic side dish Granny would make when it was going to be a fancy dinner. Like pork chops.

    A Cast Iron Skillet

    As a kid it was impossible to ignore the skillet. After all, it was responsible for many of the tantalizing, and appetizing smells that filled Granny’s house at mealtimes. It was a classic tool, with a potent ability to make anyone nearby, feel extremely hungry. Furthermore, Granny used it like an expert chef from a gourmet restaurant. To this day, in my opinion, there is no cornbread like Granny’s cornbread.

    cast iron

    Nor is there any potato and onion dish that can rival that of the cast iron skillet version. Furthermore, it helps to forget the potatoes and onions a couple of times so that they get scorch marks on them from the heat. (Just a few singed pieces here and there.) And if it’s not a cast iron skillet, it’s not the same. However, it’s the cornbread that stands out all these years later. Something about that cornbread.

    It was round. Granny always made the cornbread in the cast iron skillet. So it always came out of the oven in a circular shape. Like a cake. Similarly, when sliced, it became cornbread wedges. Piping hot, homemade, cast iron skillet cornbread wedges. Furthermore, it was always from scratch. What an awesome experience, watching all the ingredients mixed together and combined. Then the sizzle as the batter pours into the hot cast iron skillet.

    The Best Cornbread Recipe

    The heated pan. “Getting the griddle hot,” as Granny used to say. It was how the top of the cornbread got its crust. For example, from the oven, it went topside down on the serving plate. Sometimes a few slices of real butter went on top. Unless the butter was for the morning’s toast. We didn’t need the butter anyway. The cornbread was a star all on its own.

    The exact recipe of the cornbread is a mystery. I remember the heated pan because Granny would tilt it, and shake it, to get the cooking grease to spread evenly just before the cornbread batter went in. Then an hour or so of the sweet aroma of baking cornbread filling the entire house. That was also a signal that dinner was on the horizon. It was impossible not to look forward to dinner with the smell of fresh baked cornbread filling the house.

    cast iron

    There are many delicious cornbread recipes on the internet. Some of them specifically geared toward the cast iron skillet method. Although it wasn’t so much a method to Granny. It was just her way of doing it. Of course after preparing a meal like that, it was normal for everyone to sit in the same room while eating. Sometimes at the same table. Without any kind of screen. Just everyone looking at everyone else. And all that glorious cornbread. Thanks for reading.

    New updates available in the main ebooks menu option. Audio book versions are now available. All e-books are in PDF format and some already have the audio version option available. Use this link to quickly find The Pawn Ticket: Redemption. Or this link for Turtles Wolf and Frog: Spirits. Audio and ebook versions available.


    Thank you for reading! Like, follow and share The Frog Journal on X @1finja1 – and on The Frog Journal Facebook page click here. Subscribe to the free newsletter to stay up to date on new content and updates.


  • A better candy for the win

    A better candy for the win

    A better candy for the win

    It’s the best candy ever made! Of course, this is my opinion. It was unexpected to see this candy in the grocery store. Yet, there it was, on the bakery shelf. Although I had not seen this candy in years, there it was. In fact, my mother’s recipe was the last time I ever saw this candy.

    Not only is this candy delicious, but also it is addictive! In fact, the thing that sets this candy apart from the rest is its uniqueness. It is called the Peanut Butter Pinwheel and it is an incredible treat.

    Better Candy

    A classic and simple sweet desert snack, this treat is timeless. Preparation is simple, ingredients are few, and the end result is a win! The ingredient list:

    • 1/2 cup mashed potatoes
    • 1/2 cup salted butter softened
    • 6-7 cups powdered sugar
    • 2 teaspoons vanilla extract
    • creamy peanut butter for filling
    (Recipe yields approx. 35 - 40 pinwheels)

    This is a small ingredient list, however it yields great results. Delicious results that are more like desert than snack. Furthermore, it is an artful treat. Especially when this desert snack appears. It is visually appetizing, as well as a tasty candy.

    Ingredients

    Now, about those potatoes. They are not on the ingredient list as a joke. However, it is unusual for potatoes to be in a sweet desert snack. Somehow it just feels like dinner when we talk about mashed potatoes.

    I felt a bit incredulous when I heard this recipe from my mom. Therefore, I asked for a repeat of the recipe, because I was certain I misheard the potatoes. However, my hearing was fine, it was a potato. In fact, it is actually a major part of the recipe. And the finished candy.

    Prep

    The potato helps create a workable dough. The details of the prep, for this part of the recipe, are important. For the purpose of this article we are going to condense just a little. Therefore, let the potatoes cool once they are mashed. Before, adding any powdered sugar.

    A better candy for the win

    This will prevent the dough from being too runny. Likewise, the desired consistency will be able to hold its shape without being too sticky. Or runny. According to the expert, allowing the potatoes to cool to room temp is best. Furthermore, patience is key.

    With this in mind, cool the potatoes to room temp, and mix the vanilla and butter into the potatoes. Then add the sugar, mixing in one cup at a time to form a dough. Furthermore, a too sticky or too runny dough, needs more sugar in the mix.

    A better candy for the win

    Dust the surface of the prep area with powdered sugar and roll the dough into a 1/4″ thick rectangle. The peanut butter filling comes next. Spread evenly over the dough, leaving a 1/4′ border of untouched dough.

    Next comes the fun. Carefully roll the finished dough, into a roll, and slice. The recipe makes about 35 candies. Thanks for reading today. If you have a variation on this recipe, please share in the comments!


    Thank you for reading! Like, follow and share The Frog Journal on X @1finja1 – and on The Frog Journal Facebook page click here. Subscribe to the free newsletter to stay up to date on new content and updates.

    A better candy for the win

  • The excellent chili wrap up

    The excellent chili wrap up

    The excellent chili wrap up

    Chili wrap ups are excellent. Recipes that include green chilies are usually a little spicy. Sometimes a little zesty as well. This one is no exception and it has cheese! A lot of cheese.

    Not only is there cheese, but also mushroom cream soup. With this in mind, it might be a good time to mention this recipe will be bringing the heat! It is a variation on green chili enchiladas, or tortilla roll ups. In many versions of this recipe the tortillas are sliced into pinwheels.

    With the pinwheels it becomes a really appetizing snack. However it is also possible to spin this recipe into an excellent supper. The differences are in the preparation. Furthermore, all the ingredients are the same except for one small twist in dinner form.

    Excellent Chili Wrap Up

    It all starts with growing some excellent green chili peppers, in a nice garden. However, for those looking to speed things up, a couple of cans of green chilies will also work. Also, prep time on this one is a little more involved, but the end result is worth it. Ingredients are pretty common for this version of the recipe.

    • 6 – 10.75 oz. cans condensed cream of mushroom soup.
    • 4 – 8 oz. packages shredded cheddar cheese.
    • 6 – small cans diced green chili peppers. (temp=mild)
    • 2 – medium onions for dicing.
    • 1 – 16 oz container sour cream.
    • 4 – small cans sliced black olives.
    • 1 – package of large flour tortillas.

    Now that the ingredients are listed, time for prep. Likewise, preheating the oven to 375 degrees is an excellent start. While the oven heats up, onions can be diced and mixed with everything. However, save one package of cheese, to the side for now.

    The Wrap Up

    The pinwheel version of this recipe has cream cheese in place of the condensed soup. It creates a snack type of treat. This variation, of the recipe, creates a casserole type of dish, that is perfect for dinner. Moreover, this dish is entirely vegetarian.

    The excellent chili wrap up

    After combining all the ingredients fill and roll the flour tortillas. Making sure to save a small portion of the filling for later. (about 1 to 2 wraps worth) Next place the finished wraps in a casserole pan. Then add a small amount of milk to the remaining mix and whisk lightly. It should appear thinned like a gravy. But not soupy.

    Pour the gravy mixture over the prepared chili wraps. Next, sprinkle with the cheese from the package set aside from earlier. Then place in the oven for 45 minutes to an hour. Or, until the cheese is melted all the way through the tortillas. Finally, serve hot and enjoy.


    Thank you for reading! Like, follow and share The Frog Journal on X @1finja1 – and on The Frog Journal Facebook page click here. Subscribe to the free newsletter to stay up to date on new content and updates.


    Excellent chili wrap